Creating a Derived Form from a Base Form.
An Object-Oriented language allows creating base objects to then derive or inherit from them. There are many benefits behind creating a base object but perhaps one of the most obvious ones is the ability to pack functionality inside an object which can then be reused many times over in the application or even in many other different applications. The main secret behind creating a base object is its level of abstraction, this means that, when possible, the object should be as generic as possible. For example the control buttons for an application, the menu dispatching forms, or the form itself out of which the application is being built.
The level of abstraction will allow the programmer to build on top it meaning writing less code regarding functionality and more code related to the application itself or what is called the application's business logic.
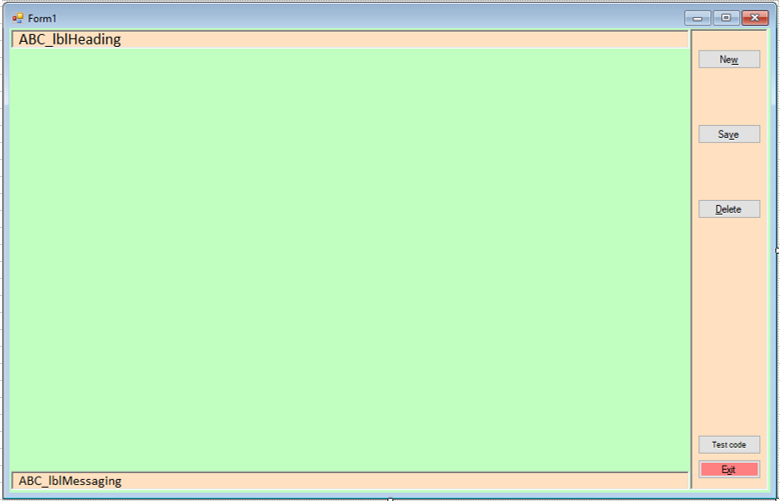
In Figure 1 below you can see the final product. Our Base Form will have four control buttons, one label at the bottom to show messages to the user, and one label at the top to display the application's name being hosted by the form as in "Client's Catalog" or "Processing Payroll" or whatnot.
Figure 1: abcBaseForm with buttons.
Let’s start by creating a common Windows Form so fired up Microsoft Visual Studio and create a new project:
Figure 2: Creating a new Windows Form project using Microsoft Visual Studio.
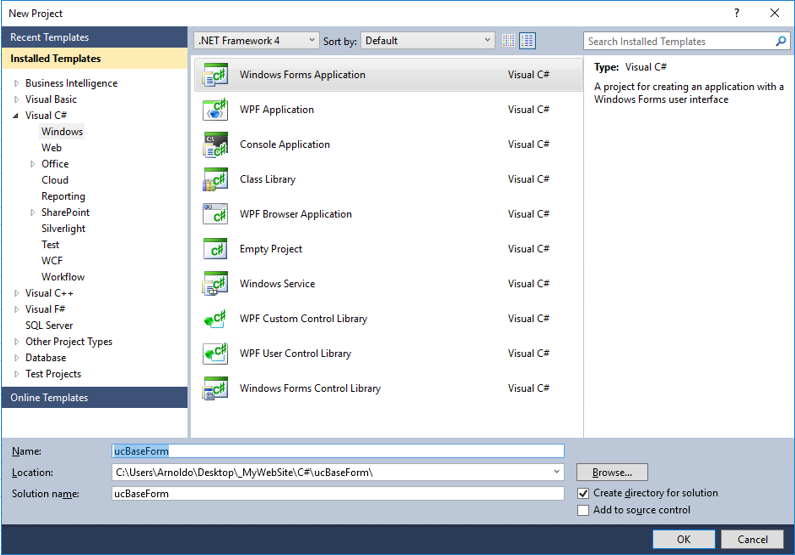
Assign a proper name to what will become your base form, I named mine ucBaseForm (uc as in User Control), and select a folder where your application will be living (see Figure 2 above). After clicking OK, the new project is created for you and an empty form is attached to it by default.
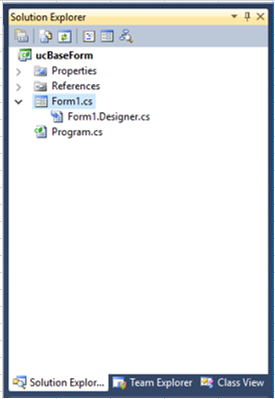
The form was named Form1 so let’s rename it to a more meaningful name. To the right of your Visual Studio you should have a pane called Solution Explorer as in Figure 3 below.
Figure 3: Solution Explorer.
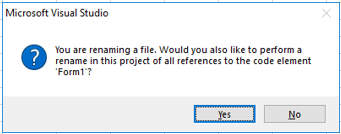
Select the object called Form1 by clicking once on it, then right-click it, and from the popup menu select Rename then input a new name including the extension .cs (dot cs). While in the process of renaming the form, a question pops up asking if you want to rename all objects found with the prior name to the new name. Answer Yes to that question.
Figure 3.1: Renaming the new Form.
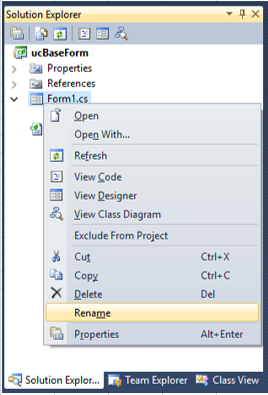
Figure 3.2: Renaming Question.
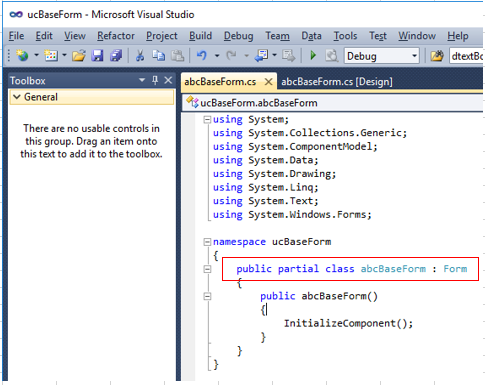
Before continue let’s review what we have done so far, go back to the pane where you can see the actual form and right-click on top of it and from the popup menu select View Code. That will take you to a new pane in Visual Studio where you can see the code behind the form and as you can see, right off the bat, we are inheriting from a Control called Form as it is indicated by the line of code:
public partial class abcBaseForm : Form
So, as per the line of code above, our base form abcBaseForm, has already inherited look and functionality from another control called Form. Something else should be noted, our Base Form lives in a Namespace called ucBaseForm. Namespaces are important for C# and the .Net framework so I recommend to take some time learning about them.
Figure 4: Our Base Form code so far.
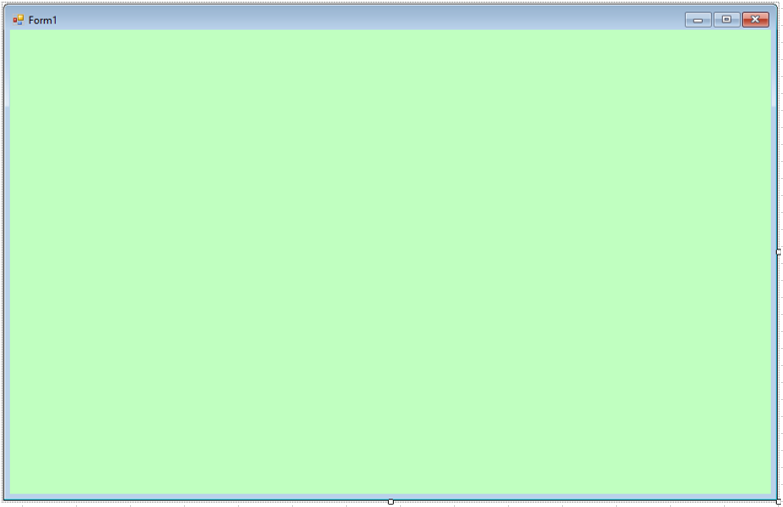
After reviewing what we have accomplished so far we should now take a look at the form and start making some changes to it. On Figure 5 below we can see the form right after the project was created.
Figure 5: Basic form.

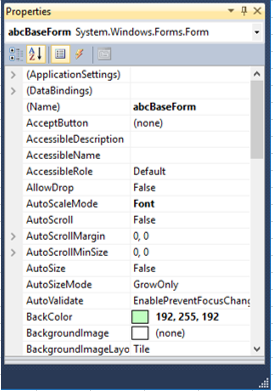
Go to the bottom right side of the Microsoft Visual Studio and find the Properties pane (see Figure 6 below) and change the properties following Table 1 below.
| Property Name | Property Value |
|---|---|
| BackColor: | 192, 255, 192 |
| Size: | 918, 585 |
Figure 6: Properties Pane.
After changing the two properties shown above your form should look like Figure 7 below:
Figure 7: abcBaseForm after changing its size and back color.
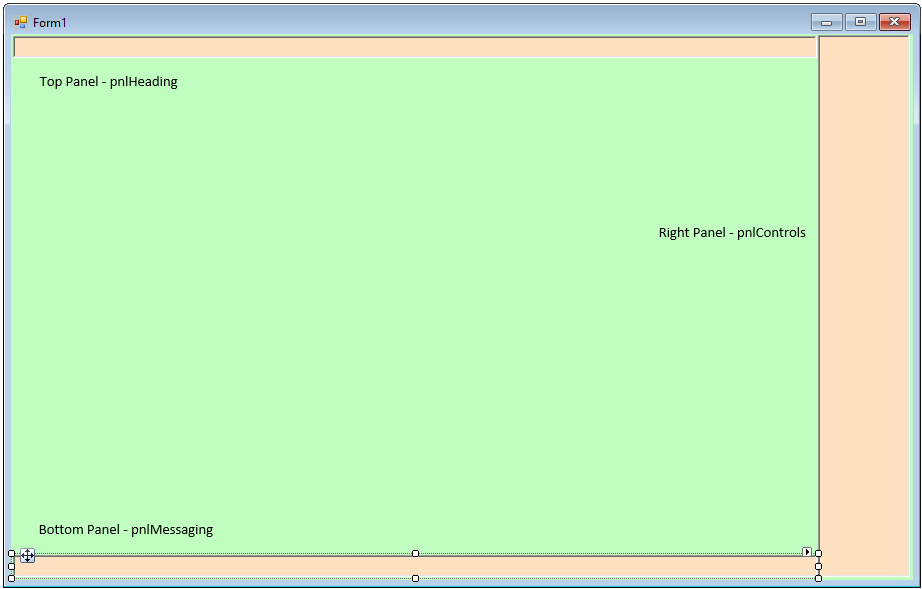
Now go to the left of Microsoft Visual Studio and find the Toolbox pane (Figure 8). The Toolbox contains all sorts of controls, locate and expand the Containers group and double click the Panel control three (3) times, and change the panels's values following Table 2. See Figure 9 for more instructions.
| Control Name | Property Name | Property Value |
|---|---|---|
| Top Panel: | Name: | pnlHeading |
| BackColor: | 255, 224, 192 | |
| BorderStyle: | Fixed3D | |
| Location: | 2,2 | |
| Size: | 804, 22 | |
| Bottom Panel: | Name: | pnlMessaging |
| BackColor: | 255, 224, 192 | |
| BorderStyle: | Fixed3D | |
| Location: | 2,521 | |
| Size: | 804, 22 | |
| Right Panel: | Name: | pnlControls |
| BackColor: | 255, 224, 192 | |
| BorderStyle: | Fixed3D | |
| Location: | 807, 1 | |
| Size: | 92, 542 |
Figure 8: Toolbox pane.
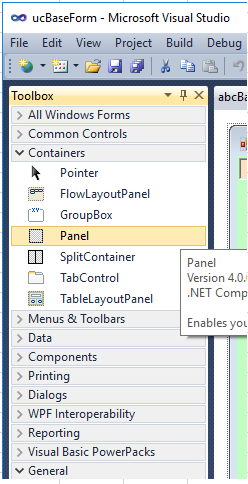
Figure 9: abcBaseForm with Panels.
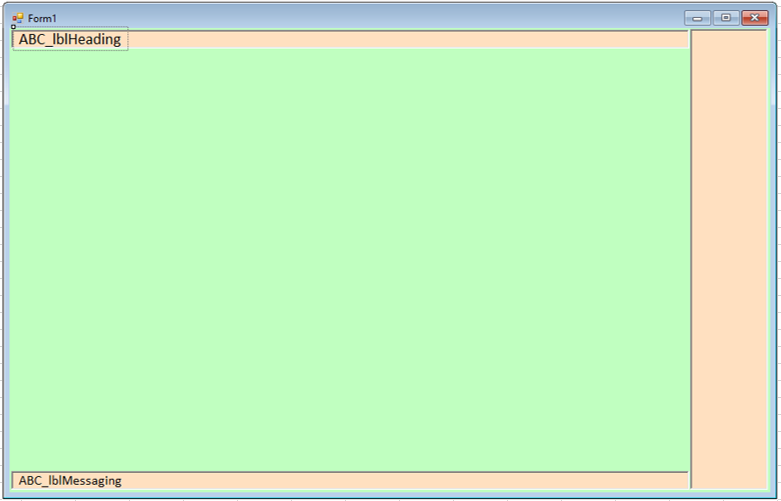
Now go back to the Toolbox pane and under the Common Controls group locate and double-click the Label control a couple of times to assign two labels to our base form. Change the properties according to Table 3 below and see Figure 10 for the graphical representation. Drag each individual label and drop one inside the top panel and one inside the bottom panel.
| Control Name | Property Name | Property Value |
|---|---|---|
| Top Label: | Name: | ABC_lblHeading |
| BackColor: | 255, 224, 192 | |
| Font: | Calibri, 14.25pt | |
| Location: | 3,-3 | |
| Size: | 131,23 | |
| Bottom Label: | Name: | ABC_lblMessaging |
| BackColor: | 255, 224, 192 | |
| Font: | Calibri, 14.25pt | |
| Location: | 3,-1 | |
| Size: | 131,19 |
Figure 10: abcBaseForm with two Labels.
Now let’s add Buttons. Go back to the Toolbox pane, locate the Button control and add four buttons, and placed them inside the pnlControls panel as seen in Figure 11. Changed the indicated properties according to Table 4 below:
| Control Name | Proerty Name | Property Value |
|---|---|---|
| New Button: | Name: | ABC_btnNew |
| BackColor: | 255, 224, 192 | |
| Location: | 7,22 | |
| Modifiers: | Protected | |
| Size: | 75, 23 | |
| Text: | Ne&w | |
| Save Button: | Name: | ABC_btnSave |
| BackColor: | 255, 224, 192 | |
| Location: | 7,110 | |
| Modifiers: | Protected | |
| Size: | 75, 23 | |
| Text: | Sa&ve | |
| Delete Button: | Name: | ABC_btnDelete |
| BackColor: | 255, 224, 192 | |
| Location: | 7,198 | |
| Modifiers: | Protected | |
| Size: | 75, 23 | |
| Text: | &Delete | |
| Exit Button: | Name: | ABC_btnExit |
| BackColor: | 255, 128, 128 | |
| Location: | 7,504 | |
| Modifiers: | Protected | |
| Size: | 75, 23 | |
| Text: | E&xit |
Figure 11: abcBaseForm with buttons.
The ampersand (&) in the Button’s Text above makes the trailing character a hot-key and its shown underlined on the screen.
At this point we have pretty much created the structure for our base form. This form can be used and reused, for example, while creating those pesky Data Dictionaries all applications have in common. Those database tables that contain information like student demographics, state cities, items catalog, and so many other tables that allow database normalization but are repetitive in operation.
We will be writing code behind this form that allows to use it in different types of dictionaries so the code has to be as much abstracted as possible or with no design-compromised to any particular application. In other words as much generic as possible.
I have created a couple of inherited controls, a TextBox and a CheckBox, designed from scratch to be coupled to this Base Form and its logic and functionality. I will go over these controls and how they couple with the form in the next project so stay tune and keep reading.
Before proceed I would like to talk a little bit about the concept behind this Base Form and its inherited child and how they will operate from the point of view of C# and the programmer.
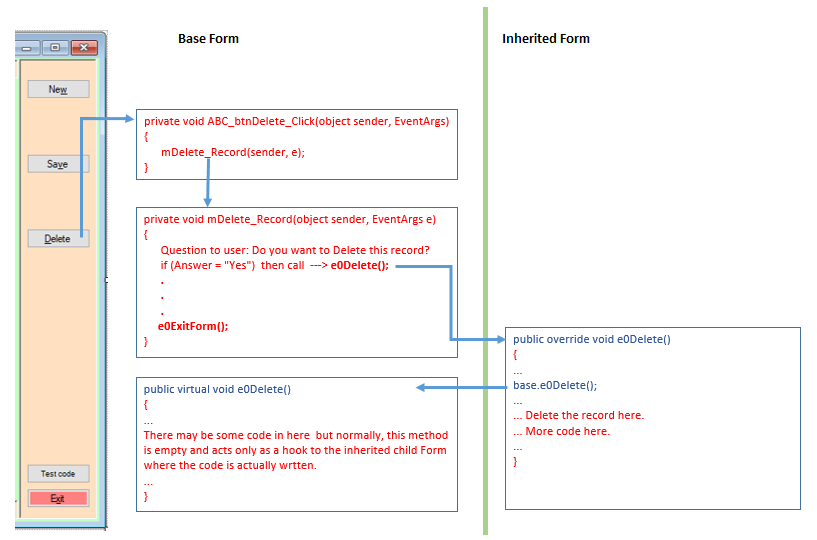
In the base form I will be creating methods and events that could be overridden by a derived form so, for example, when I click the “New” button, a private method called “New_Record” will be invoked. This “New_Record” method will do preparatory work to then invoke another method called “e0New” which happens to be an over-ridable method. See Figure 12 for a graphical representation of the design.
Figure 12: Logic behind the System.
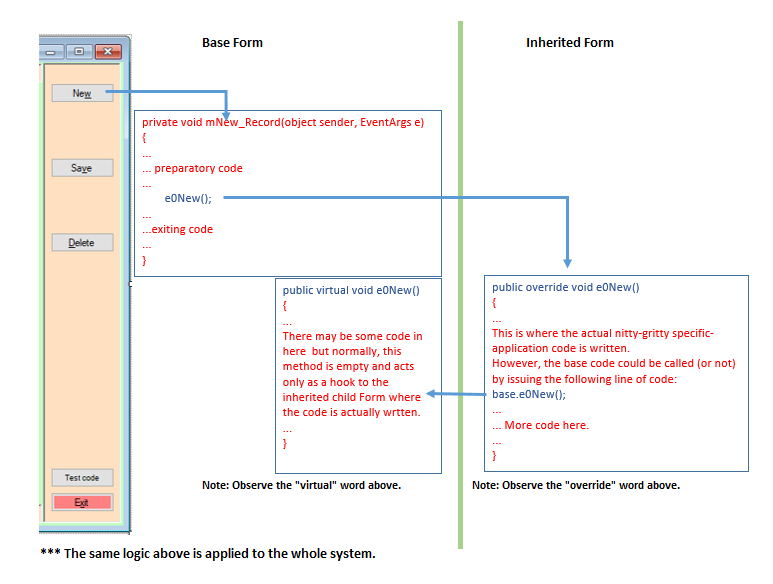
The keyword “virtual” in the method declaration allows to be overridden in a derived class as you can see in Figure 12.
After we have reviewed the basic logic behind the form and how it will be working once it is derived, I would like to explain with words the tasks that, eventually, I will be implementing with code so in the text below I explain the whole “New Mode” cycle.
Going through a "New Mode" Cycle:
| a) | Button "New" gets disabled. |
| b) | Button "Save" gets disabled. |
| c) | Button "Delete" gets disabled. |
| d) | Button "Exit" stays enabled. |
| e) | _P0Messaging displays a "Add Mode" message. |
| f) | _P0FormState = 1 indicating Add Mode. |
| g) | A message is sent out via Delegate dFormNewMode signaling to whoever is subscribed to this message that the form is now in "New Mode". |
| h) | Over-ridable Method e0New() is invoked. This method is set to be overridden in the Derived Form allowing users of this derived control to write code on it. |
| a) | User will fill out the form's controls as TextBox, CheckMarks, DataGridViews, Lists, DropDowns, etc. |
| b) | Some of this controls are marked as Required so user will have to fill out these required controls. |
| c) | Once the required controls are filled out, the "Save" button will become enabled giving the user the option to save the information just typed in. |
| a) | The "Exit" button is always enabled so the user has the option to leave the "New Mode" at any time. |
| b) | Once in the "New Mode", all the controls are in idle mode waiting for the user to type new information. |
| c) | There is a property called _P0DataChanged that becomes True as soon as one of the controls is changed. |
| d) | So maybe _P0DataChanged is now True but not all the required controls are fulfilled so the "Save" button remains disabled. |
| e) | If the user clicks on "Exit", the form warns the user that some of the controls are now modified, and asks for confirmation to exit. If the user answers "No to Exit" then the "New Mode" continues. If the user answers "Yes to Exit" the changes are discarded and the form leaves the "New Mode" |
| f) | If the "Save" button is now active indicating that all required controls are now filled out and the user clicks the "Exit" button then it goes into item (e) above. |
| g) | The user clicks the "Save" button, saving the information by calling the Save routine which in turns calls the overridable method called e0Save(). The overridable method e0Save allows for the programmer to type its own code on a Derived form. |
| h) | The data in the controls is now saved, the controls are Reset then loaded back with the record that was just created with the New information on the underlying table. The "New Mode" is left behind at this point and the form returns to the default mode of "Edit Mode". Forms are always in "Edit Mode" unless the underlying table is empty. |
| a) | At this point, the "New Mode" cycle has been completed and the Form returns to its normal state. |
The concept above will be our road map to write the code behind the form, so let's start writing some code and we start by declaring and creating the following properties (Table 5).
| Property | Description | Type |
|---|---|---|
| _p0FormName | Holds the Form name. | string |
| _p0Heading | Holds the Subsystem name. | string |
| _p0Messaging | To send messages to the screen. | string |
| _p0DataChanged | When true, indicates user data was altered and requires a save. | boolean |
| _p0FormState | Indicates the Form state: 1-Edit Mode (default), 2-New Mode, 3-Delete Mode | integer |
Some of these properties will appear in the Microsoft Visual Studio Properties Pane where the programmer will be able to assign values at design time.
The code below declares basic properties.
#region Framework's Private and Public Properties.
//
//Properties related to 'Subsystem ~ user' interface
private string _p0FormName;     //This property holds the Form name.
private string _p0Heading;      //This property holds the Subsystem name.
private string _p0Messaging;    //This property is used to send message to the screen.
private bool _p0DataChanged;    //This property is used to flag that data in form has been changed and requires 'Save'.

//Properties related to handle Subsystem's internal Functionality
private int _p0FormState = 0;       //This property holds a int value indicating the state of the form.
									//A form has three (3) states:
									//0 - Edit Mode (Default Mode)
									//1 - New Mode
									//2 - Delete Mode
//
[Description("Form's Name"), Category("Appearance")]
public string _P0FormName
{
	get { return _p0FormName; }
	set
	{
		_p0FormName = value;
		m0UpdateFormName();
	}
}
//
[Description("Heading text shown at the Form's Top"), Category("Appearance")]
public string _P0Heading
{
	get { return _p0Heading; }
	set
	{
		_p0Heading = value;
		m0UpdateHeading();
	}
}
[Description("Text shown as message at the bottom of the form"), Browsable(false)]
public string _P0Messaging
{
	get { return _p0Messaging; }
	set
	{
		_p0Messaging = value;
		m0UpdateMessage();
	}
}
[Description("Text shown as message at the bottom of the form"), Browsable(false)]
public int _P0FormState
{
	get { return _p0FormState; }
	set { _p0FormState = value; }
}
[Description("0-Edit Mode, 1-New Mode, 2-Delete Mode"), Browsable(true)]
public bool _P0DataChanged
{
	get { return _p0DataChanged; }
	set { _p0DataChanged = value; }
}
//
//List _pControls = new List(); //This variable holds a list of all the controls in the form.
//
#endregion
Observe how the first three properties do additional tasks when their value is changed. For example, by assigning a text to the _p0Messaging property, the function m0UpdateMessage() is called which, in turn, does the actual display of the message in the screen.
Next I will explain how the "Delete" Button Click works to then, explain the “New” Button Click which is a little more elaborated.
The code below handles the Delete Button Click:
#region Delete Button code
//-------------------------------------------------------------------------------
//                      Delete Button Click Event
// ABC_btnDelete_Click
//-------------------------------------------------------------------------------
private void ABC_btnDelete_Click(object sender, EventArgs e)
{
	mDelete_Record(sender, e);
}
//
private void mDelete_Record(object sender, EventArgs e)
{
	_P0Messaging = "Delete Mode";
	_P0FormState = 2;
	//
	foreach (Control c in _pControls) { c.Enabled = false; } ABC_btnExit.Enabled = true;
	//
	string _v0MsgToUsr = "Do you want to Delete this record?";
	DialogResult _v0Answer = MessageBox.Show(_v0MsgToUsr, "System Message",
	MessageBoxButtons.YesNo, MessageBoxIcon.Question, MessageBoxDefaultButton.Button2);
	//
	if (_v0Answer == DialogResult.Yes) { e0Delete(); }
	//
	m0ExitForm();
}
//
//-------------------------------------------------------------------------------
//                      Called by Form's Delete event
//  e0Delete()
//-------------------------------------------------------------------------------
public virtual void e0Delete()
{
//The record(s) will not be deleted on this method but on the inherited form.
//The code deleting the record(s) will be written on this method but on the inherited form.
//This is the beauty of a framework like this that I get to use a generic template but with a window (read method) to write singular code.
}
//
//-------------------------------------------------------------------------------
//                      Method Exit Form
//  mExitForm()
//  Method to be called when need to ask user about exiting the form.
//  Called by the Exit Button Click event.
//-------------------------------------------------------------------------------
public virtual void m0ExitForm()
{
	e0Read();
	//
	_P0Messaging = "";
	_P0FormState = 0;
	_P0DataChanged = false;
	//
	ABC_btnNew.Enabled = true;
	ABC_btnDelete.Enabled = true;
	ABC_btnExit.Enabled = true;
	ABC_btnSave.Enabled = false;
}
#endregion
Explaining the code above:
The user click the Delete button so the event ABC_btnDelete_Click() is invoked which in turn calls the method mDelete_Record. mDelete_Record process some preparation code including asking the user if she or he really wants to delete the record or records. If the user answers No then nothing happens and the m0ExitForm method is called which brings the form to the default Edit mode but if the user answers Yes then the method e0Delete is called.
Now, remember that e0Delete was declared as a Public Virtual method. That means that when I derive a new form out of this form, I will be able to customize my e0Delete method with the proper code to delete one, or two, or many records according to the database table I am handling at that particular moment.
See the diagram below (Figure 13) as a visual representation to the words above.
Figure 13: Clicking the Delete button.
We will now review how the "New" Button Click works and go over the code behind the button. In the code below observe how the concept is the same but with minor changes, the template is able perform a totally different task.
#region New Button Code
//-------------------------------------------------------------------------------
//                      New Button Click Event
//  ABC_btnNew_Click
//-------------------------------------------------------------------------------
private void ABC_btnNew_Click(object sender, EventArgs e)
{
	mNew_Record(sender, e);
}
//
private void mNew_Record(object sender, EventArgs e)
{
	bool mGoToAddDeleteMode = false;
	if (_P0DataChanged == true)
	{
		string _v0MsgToUsr = "Do you want to discard the changes and go into New Mode?";
		DialogResult _v0Answer = MessageBox.Show(_v0MsgToUsr, "System Message",
		MessageBoxButtons.YesNo, MessageBoxIcon.Question, MessageBoxDefaultButton.Button2);
		//
		if (_v0Answer == DialogResult.Yes) { mGoToAddDeleteMode = true; }
	}
	else { mGoToAddDeleteMode = true; }
	//
	if (mGoToAddDeleteMode == true)
	{
		_P0Messaging = "New Mode"; _P0FormState = 1;
		//
		foreach (Control c in _pControls) { c.Enabled = false; } ABC_btnExit.Enabled = true;
		//
		e0New(); //Invoke overridable method.
		//
		_P0DataChanged = false;
	}
}
//
//-------------------------------------------------------------------------------
//                      Called by Form's New event
//  e0New()
//-------------------------------------------------------------------------------
public virtual void e0New()
{
//This is an overridable method that gets called up from the derived form
//so I can place code here that will be processed when the new buttons is click.
//MessageBox.Show("on base e0New() method");
}
#endregion
As you can see in the code above, when the user clicks the New button, the event ABC_btnNew_Click() is invoked which in turn calls the mNew_Record method.
Once in the mNew_Record method, the variable _P0DataChanged that indicates user’s data changes is checked, if the variable is True (Boolean true), signaling that data was changed, then it proceeds to inquired the user about discarding the changes and go to the New Mode.
If the user decides to discard the data changes (if any), then the method e0New is called where preparatory steps are taken before go into the New Mode. In this case e0New is the Public Virtual Method that would be used in the derived form to do tasks specific to the particular system being created
Ok let’s recapitulate and enumerated in simple steps what we have learned so far:
| 1 | Open Microsoft Visual Studio. |
| 2 | Create a new project. |
| 3 | Add a Form. The form is added by default when creating a new C# Windows project. |
| 4 | Add any controls you want. |
| 5 | Build the Application. |
Up to step 4 you have created what will be the Base Form so you should be careful with the name you assign to this base Form as well as with the memory variables, properties, methods, and events because they all will become the inherited members when we create a new derived Form out of this Base Form.
Steps to inherit or derive from the Base Form:
| 1 | In the same project, right-click the project and select Add New Item. See Figure 14 below. |
| 2 | Select Windows Forms then select Inherited Form. See Figure 15 below. |
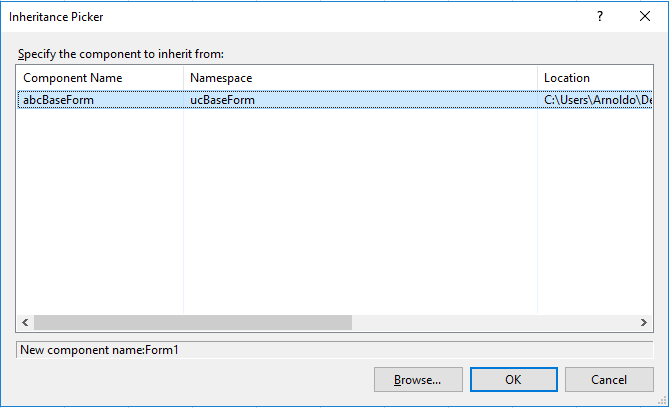
| 3 | Next a Dialog box pops up showing our Base Form.Select the Base Form(Figure 16 below). |
| 4 | Give it a proper name and click Ok. |
Figure 14. Right-Click Project and select Add ~ Windows Form…
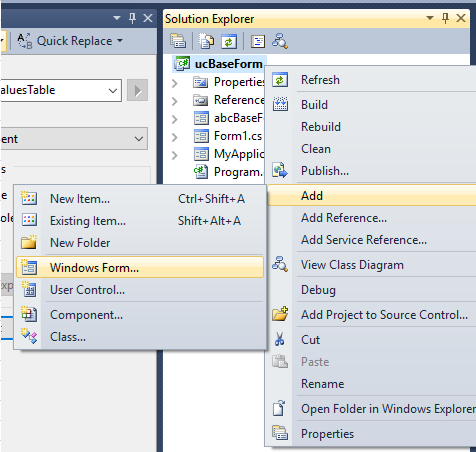
Figure 15. Select Windows Form then Inherited Form.
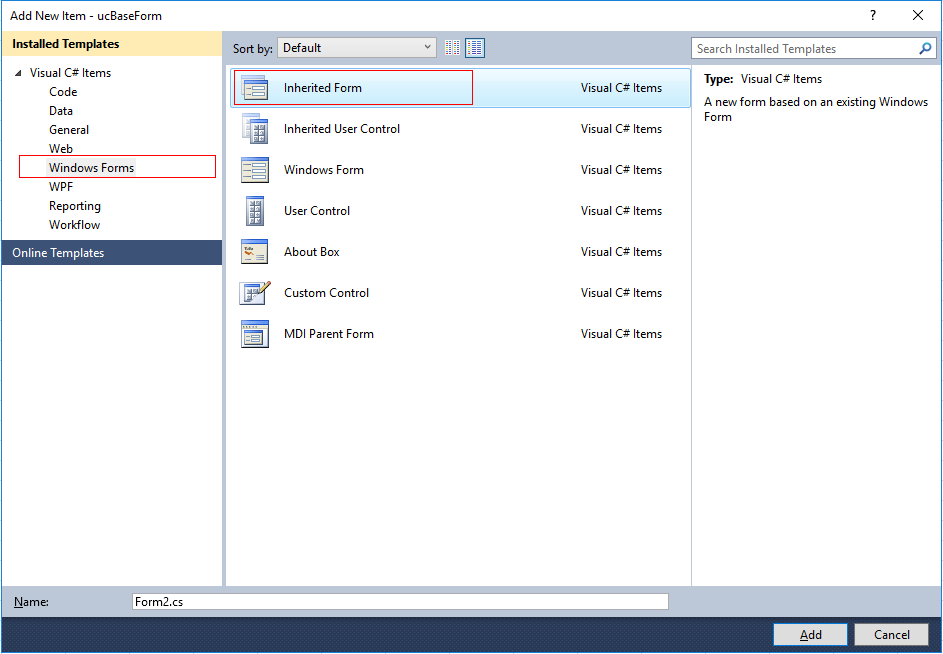
Figure 16. Dialog box to select Inherited Form.
At this point you should have a derived form containing all the functionality written and contained inside the base form, and any change made to the base form immediately comes across to the derived form. That is all folks, please check out the video to see the derived form at work. On my next project I will be creating a couple of controls designed to work under this framework so please go check it out. Don’t forget to leave your comments below and to contact me for a link to download this project.
Videos
Base Form at work demo